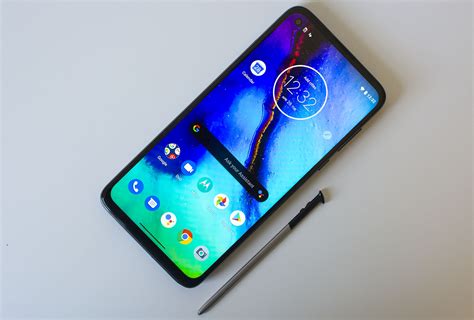
Screenshot with Moto G Stylus
The Moto G Stylus is a versatile smartphone that comes with a built-in stylus, perfect for taking quick notes and sketching on the go. Apart from its stylus capabilities, it also allows you to capture screenshots effortlessly. In this tutorial, we will guide you on how to take a screenshot using your Moto G Stylus in a few simple steps.
Step 1: Access the Screen You Want to Capture
Before taking a screenshot, navigate to the screen you wish to capture on your Moto G Stylus. Whether it's a funny text conversation, an insightful article, or an impressive game score, make sure everything is positioned the way you want it in the frame.
Step 2: Press the Power and Volume Down Buttons Simultaneously
To capture the screenshot, you need to press and hold the Power button and the Volume Down button at the same time until you see a visual confirmation on the screen. This action will trigger the Moto G Stylus to capture the current screen and save it as an image file.
Step 3: Locate the Screenshot in Your Gallery
Once you release the buttons, the Moto G Stylus will provide a short animation or sound to indicate that the screenshot has been successfully taken. To access your captured screenshot, open the Gallery app on your smartphone. The screenshot should be located in the "Screenshots" or "Pictures" folder.

Step 4: Edit or Share the Screenshot (Optional)
The Moto G Stylus also offers several editing and sharing options for your screenshots. When viewing the screenshot in the Gallery app, you can tap on the edit button (usually represented by a pencil icon) to crop, annotate, or add filters to the image. Once you are satisfied with the edits, you can save it or share it directly with your contacts through various messaging or social media apps.
Step 5: Capture a Scrollable Screenshot (Optional)
In addition to capturing a single screen, the Moto G Stylus also lets you take scrollable screenshots, allowing you to capture an entire webpage or a longer chat conversation. To do this, follow the steps mentioned above to take a regular screenshot. Once the initial screenshot is taken, you will see a small pop-up at the bottom of the screen asking if you want to "Scroll" or "Capture More." Tap on this pop-up to initiate the scrolling process, and the Moto G Stylus will automatically capture and stitch together multiple screens to create a seamless, scrollable screenshot.
Conclusion
Capturing screenshots with your Moto G Stylus is a simple yet useful feature that allows you to quickly save and share memorable moments or important information. By following the step-by-step tutorial mentioned above, you can effortlessly capture screenshots, edit them if needed, and share them with friends and family. Take advantage of the Moto G Stylus's built-in stylus and screenshot capabilities to enhance your productivity and creativity on-the-go.With the Moto G Stylus, capturing screenshots has never been easier. Quickly grab important information, create a visual reference, or share memorable moments with just a few simple steps. Don't miss out on this handy feature - start capturing screenshots on your Moto G Stylus today.
No comments:
Post a Comment