How to Turn off the "Hello Moto" Feature on Your Phone

Introduction

hello moto

Many Android phone users have encountered the "Hello Moto" feature, where their phone greets them with this phrase upon startup. While it may initially seem charming, some users find it annoying or unnecessary. If you're one of those users, don't worry! In this tutorial, we will guide you through the process of turning off the "Hello Moto" feature on your phone.

Disabling "Hello Moto"

turn off hello moto

The steps to disable the "Hello Moto" feature may vary slightly depending on the make and model of your Android phone. However, the general process remains quite similar. Follow the steps below:

Step 1: Access Settings

access phone settings

To begin, unlock your phone and locate the Settings app. The Settings app is typically represented by a gear icon and can usually be found on your home screen or in the app drawer. Tap on the Settings app to open it.

Step 2: Navigate to Sound & Notification Settings

sound and notification settings

Once you have accessed the Settings app, scroll down and find the "Sound & Notification" (or similar) option. This option may be located under different names, depending on your phone's manufacturer and Android version. Tap on it to open the Sound & Notification settings.

Step 3: Locate the Start-Up Sound Option

start-up sound settings

Within the Sound & Notification settings, keep scrolling until you find the "Start-Up Sound" (or similar) option. This option controls the sound that plays when you turn on your phone. Tap on it to access the Start-Up Sound settings.

Step 4: Disable the Start-Up Sound

disable start-up sound

Finally, within the Start-Up Sound settings, you will see a toggle switch or checkbox that enables or disables the feature. Toggle off or uncheck the option related to the "Hello Moto" feature. This will effectively deactivate the sound and prevent it from playing when you turn on your phone.

Conclusion

By following the steps outlined in this tutorial, you can easily turn off the "Hello Moto" feature on your Android phone. This will allow you to start your phone without being greeted by the familiar phrase. Remember that the specific steps may vary slightly depending on your phone's make and model, but the overall process remains the same. We hope this tutorial has been helpful, and you can now enjoy a quieter phone start-up experience without the "Hello Moto" greeting.

Semantic Keywords

"Hello Moto", disable "Hello Moto", Android phone, turn off greeting, start-up sound, phone settings, sound and notification, access sound settings, Android tutorial, turn off phone greeting, quieter start-up experience.

How to Play Madden 22 Online with Friends: A Comprehensive Tutorial

Getting Started: Creating a Group

To play Madden 22 online with your friends, the first step is to create a group where you can invite and connect with them. Follow these steps to get started:1. Launch the game and navigate to the main menu.2. Look for the "Online" or "Multiplayer" option and select it.3. Choose the "Create Group" or "Invite Friends" option.4. Create a group name and set the preferred privacy settings. You can choose to make it public or invite-only.5. Share the group name or send invitations to your friends, either through the game's built-in invite system or via platform-specific messaging.By creating a group, you establish a central hub where you and your friends can gather, chat, and organize matches.

Inviting Friends to Your Group

Inviting friends to your Madden 22 group ensures that you can play together and compete against each other. Here are the steps to invite your friends:1. Open the group menu from the main menu or pause screen.2. Navigate to the "Invite Friends" section.3. Choose the platform or method through which you want to send the invitation. You can use console-specific friend lists, social media messaging, or email.4. Select your friends from the list or enter their usernames to send invites directly.5. Once the invitations are sent, your friends will receive notifications and can join your group.Remember, communication is key to ensuring everyone receives the invites and can easily join the group.

Setting Up a Private Match

Now that your friends are in the group, it's time to set up a private match in Madden 22. Follow these steps to get started:1. Once your group is established, access the online or multiplayer menu.2. Look for the "Private Match" or "Create Match" option.3. Choose the game mode you want to play, such as Exhibition or Online Franchise.4. Customize the match settings, including game length, difficulty level, and specific rules.5. Select the participants from your group who will be playing in the match.6. Start the match and enjoy the game with your friends!Setting up a private match allows you to have exclusive sessions with your friends, ensuring a more personalized and enjoyable experience.

Exploring the Online Franchise Mode

Madden 22 offers an exciting online franchise mode where you and your friends can compete in a continuous league. Here's how to get started with the online franchise:1. Access the online or multiplayer menu in the game.2. Look for the "Online Franchise" or "Create Online League" option.3. Set up the league details, such as duration, team selection rules, and league size.4. Invite your friends to join the league by sending them invitations through the game or your preferred communication method.5. Once everyone has joined, you can start the league and begin playing scheduled matches against each other.The online franchise mode adds depth and longevity to your Madden 22 experience, allowing you and your friends to compete over multiple seasons and build your teams to greatness.

Enhancing the Experience with Voice Chat

Effective communication is crucial when playing Madden 22 online with friends. Utilizing voice chat adds a new level of interaction and coordination. Here's how to set up voice chat:1. Check if the game offers an in-built voice chat feature. If it does, enable it in the game settings.2. Alternatively, use external voice chat platforms like Discord or party chat on consoles.3. Set up a voice chat channel or server dedicated to your Madden 22 group.4. Share the voice chat details with your friends, such as the server name, channel name, or invite link.5. Join the voice chat channel before starting your gaming session, ensuring everyone is connected and able to communicate effectively.Voice chat allows you and your friends to strategize, coordinate plays, and have a more immersive and engaging experience while playing Madden 22 online.In conclusion, playing Madden 22 online with friends can be a thrilling experience, and by following this tutorial, you can easily set up groups, invite friends, create private matches, explore the online franchise mode, and enhance your gameplay with voice chat. So gather your friends, create an unbeatable team, and enjoy the world of Madden 22 together!

How to Use Blink on Echo Show: A Step-by-Step Tutorial

What is Blink on Echo Show?

blink on echo showBlink on Echo Show is a powerful feature that allows you to monitor your Blink security cameras directly from your Echo Show device. With this integration, you can easily view live video feeds, see recent clips, and manage your Blink cameras using voice commands or the touch screen on your Echo Show. In this tutorial, we will guide you through the steps to set up and use Blink on Echo Show.

Setting Up Blink on Echo Show

blink on echo show setupTo begin using Blink on Echo Show, you will need to ensure that your Blink security cameras are properly set up and connected to your Blink account. Follow these steps to set up Blink on Echo Show:1. Start by downloading the Blink Home Monitor app on your smartphone or tablet.2. Open the app and create an account or sign in if you already have one.3. Once signed in, click on the "Add a Blink system" option.4. Follow the on-screen instructions to add your Blink cameras to the app and connect them to your Wi-Fi network.5. Make sure your Blink cameras are working properly and capturing video feeds.6. Now, move on to setting up Blink on your Echo Show device.

Connecting Blink to Echo Show

blink echo show connectionTo connect your Blink cameras to your Echo Show, follow these steps:1. Start by turning on your Echo Show device and making sure it is connected to the internet.2. On the home screen of your Echo Show, swipe down from the top to open the menu.3. Tap on the "Settings" option.4. In the settings menu, select "Camera" and then "Blink".5. Tap on "Discover Devices" to allow your Echo Show to search for Blink cameras.6. Once the discovery process is complete, your Echo Show will display a list of available Blink cameras.7. Select the Blink camera you want to connect to your Echo Show and follow any additional prompts to complete the setup.8. Repeat the process for any other Blink cameras you want to connect.

Using Blink on Echo Show

blink echo show usageOnce you have Blink set up on your Echo Show, here are some useful commands and actions you can perform:1. "Alexa, show me [camera name]" - This command will display the live video feed from a specific Blink camera on your Echo Show screen.2. "Alexa, show me my Blink cameras" - This will show the live feeds from all your connected Blink cameras on the Echo Show screen.3. "Alexa, play the last clip from [camera name]" - This command will play the most recent recorded clip from a specific camera on your Echo Show.4. "Alexa, stop" - Use this command to stop the live video feed or clip playback on your Echo Show.5. You can also use the touch screen on your Echo Show to swipe through different camera feeds, zoom in or out, and access additional settings.

Troubleshooting Blink on Echo Show

blink echo show troubleshootingIf you encounter any issues while using Blink on your Echo Show, try these troubleshooting tips:1. Make sure your Echo Show and Blink cameras are connected to the same Wi-Fi network.2. Check that your Blink cameras have a stable internet connection.3. Verify that you have the latest firmware updates installed on both your Echo Show and Blink cameras.4. Restart your Echo Show device and Blink cameras.5. If the issue persists, contact Blink customer support for further assistance.In conclusion, Blink on Echo Show brings the convenience of monitoring your Blink security cameras to your Echo Show device. By following the simple steps outlined in this tutorial, you can easily set up and use Blink on your Echo Show for enhanced home security and surveillance. Enjoy the seamless integration of Blink and Echo Show, and keep an eye on your home with ease.

Best Mystery Shows on Amazon Prime

1. Mindhunter

Mindhunter is a captivating mystery show available on Amazon Prime. Set in the late 1970s, the series revolves around two FBI agents, Holden Ford and Bill Tench, who venture into the world of criminal psychology to understand the motives behind heinous acts. Mindhunter explores the minds of serial killers and offers a chilling insight into their thoughts and behaviors.

With its dark and atmospheric tone, Mindhunter hooks viewers from the start. The performances by the cast, including Jonathan Groff as Holden Ford and Holt McCallany as Bill Tench, are exceptional. The show's meticulous attention to detail and accurate portrayal of real-life cases make it an intriguing watch for true crime enthusiasts.

Mindhunter

This critically acclaimed series is a must-watch for anyone interested in the psychological aspects of criminal investigations. Mindhunter delves into the complexities of the human mind, leaving viewers questioning what drives people to commit such horrific acts.

2. The Expanse

The Expanse is a science fiction mystery show that follows the lives of inhabitants from different factions in a future where humanity has colonized the solar system. With political tensions rising and a missing young woman at the center of it all, a detective named Miller is tasked with finding her, uncovering a thrilling conspiracy along the way.

This series combines elements of mystery, politics, and adventure to create a unique and gripping storyline. Each episode of The Expanse reveals new layers of intrigue and leaves viewers wanting more. The show's stunning visual effects and well-developed characters make it a standout option on Amazon Prime.

The Expanse

With its intricate world-building and engrossing plot, The Expanse is a must-watch for fans of both mystery and science fiction genres. The show offers a compelling storyline that explores the complexities of human nature and the consequences of our actions.

3. Bosch

Bosch is a gripping detective series based on Michael Connelly's popular novels. The show follows the life of Harry Bosch, a relentless detective with a troubled past, as he tackles high-profile murder cases in Los Angeles. Bosch combines procedural elements with deeper character arcs, providing a well-rounded viewing experience.

Titus Welliver's portrayal of Harry Bosch brings the character to life, capturing his determination and internal struggles perfectly. The show's atmospheric setting and intricate plotlines keep viewers engaged throughout each season. With its well-crafted mysteries and compelling characters, Bosch stands out as one of the best shows available on Amazon Prime.

Bosch

Bosch is a must-watch for fans of detective dramas, offering a mix of exciting cases and personal character development. With its realistic portrayal of police work and a central character you can't help but root for, Bosch is a top choice for mystery lovers.

4. The Marvelous Mrs. Maisel

The Marvelous Mrs. Maisel may not be a traditional mystery show, but it has enough elements to make it a delightful and intriguing option for fans of the genre. This Emmy-winning series follows Miriam "Midge" Maisel, a housewife turned stand-up comedian in the 1950s.

While the show primarily focuses on Midge's journey in the comedy world, it also weaves in mysteries surrounding her personal life and relationships. The Marvelous Mrs. Maisel expertly balances humor and drama, keeping viewers entertained while leaving them curious to uncover what's next for its vibrant and witty characters.

The Marvelous Mrs. Maisel

The Marvelous Mrs. Maisel offers a fresh twist on the mystery genre, combining it with elements of comedy and drama. With its sharp writing, impeccable period details, and stellar performances, this show provides a delightful viewing experience for those looking for a unique take on mystery storytelling.

5. Sneaky Pete

Sneaky Pete is an engrossing crime mystery series that follows Marius Josipovic, a con man who assumes the identity of his prison cellmate, Pete Murphy, to escape a dangerous criminal. Marius finds himself caught between his new family and the dangerous world he left behind, leading to gripping and suspenseful storylines.

Giovanni Ribisi's performance as Marius/Pete is outstanding, fully embodying the complex character's struggles and manipulative nature. The show's clever writing and intriguing plot twists add layers of mystery and tension to the storyline, making each episode a thrilling watch.

Sneaky Pete

Sneaky Pete is a hidden gem for mystery enthusiasts, offering an intricate and fast-paced narrative that keeps viewers hooked until the very end. With its well-developed characters and unexpected plot developments, Sneaky Pete delivers an exciting and satisfying viewing experience.

In conclusion, Amazon Prime offers a wide array of captivating mystery shows that cater to various tastes. Whether you prefer psychological thrillers or science fiction mysteries, there is something for everyone to enjoy. So grab your popcorn, sit back, and embark on an enthralling journey filled with suspense, twists, and unforgettable characters.

How to Change the Filter and Use the Levoit Air Purifier: A Step-by-Step Tutorial

Introduction

The Levoit air purifier is a reliable and efficient device that helps improve the air quality in your home or office. Regularly changing the filter is essential for maintaining optimal performance. In this tutorial, we will guide you through the process of replacing the air purifier's filter. Additionally, we will explain how to effectively use the Levoit air purifier to ensure clean and fresh air in your living space.

Step 1: Gather the Necessary Tools and Information

Before proceeding with the filter replacement process, it is important to gather all the necessary tools and information. Gather the following items:- New Levoit air purifier filter (make sure it is compatible with your specific model)- Phillips screwdriver (if required for your model)- User manual (for model-specific instructions)- Clean, dry cloth or tissue

Step 2: Turn off the Air Purifier

To ensure safety and avoid any mishaps during the filter replacement process, ensure that the Levoit air purifier is turned off. Unplug the unit from the power source and allow it to cool down if it has been running.

Step 3: Remove the Front Cover

Locate the front cover of the Levoit air purifier, which typically features the brand logo. Gently remove the cover by following the instructions provided in the user manual or by applying slight pressure to the designated areas. Please refer to the image below for visual guidance:Levoit Air Purifier Front Cover

Step 4: Take Out the Old Filter

Once the front cover is removed, you will have access to the filter compartment. Carefully remove the old filter by pulling it out from its designated slot. Dispose of the old filter following the recommended disposal methods for your area.

Step 5: Prepare the New Filter

Unbox the new Levoit air purifier filter and familiarize yourself with its components. Some filters may come with a plastic wrapping that needs to be removed before installation. Check the user manual for any specific instructions on proper filter preparation.

Step 6: Install the New Filter

Insert the new filter into the designated slot in the air purifier's filter compartment. Ensure that it is properly aligned and securely placed. Follow the user manual for any additional locking or securing mechanisms that may be required for your specific model.

Step 7: Replace the Front Cover

After successfully installing the new filter, carefully place the front cover back onto the Levoit air purifier. Apply even pressure to all edges until it clicks into place. Make sure the cover is aligned with the rest of the unit to ensure a snug fit.

Step 8: Power On and Monitor

Once the front cover is securely in place, plug the unit back into the power source and turn on the Levoit air purifier. Monitor the device for any error messages or unusual noises, which may indicate a faulty installation. Refer to the user manual for troubleshooting steps if necessary.

Using the Levoit Air Purifier Effectively

Apart from changing the filter, here are some tips to use the Levoit air purifier effectively:1. Placement: Position the air purifier in an area of the room that allows optimal air circulation, such as near a door or window. Avoid blocking the air intake or outlet vents.2. Run on Auto Mode: Utilize the auto mode feature on your Levoit air purifier to let it automatically adjust the fan speed based on the air quality in the room. This ensures energy-efficient operation and great air quality.3. Keep Doors and Windows Closed: To maximize the air purifier's efficiency, make sure to keep doors and windows closed while it is running. This prevents the influx of external pollutants.4. Regular Maintenance: Clean the air purifier's external surfaces using a clean, dry cloth or tissue regularly. This helps prevent dust buildup and maintains the device's performance.5. Filter Replacement Schedule: Refer to the user manual for the recommended filter replacement schedule specific to your Levoit air purifier model. Adhering to the schedule ensures that the device continues to provide clean and fresh air.In conclusion, changing the filter and effectively using the Levoit air purifier are crucial steps in maintaining a healthy indoor environment. By following this step-by-step tutorial and implementing the provided tips, you can enjoy clean and fresh air in your living spaces for years to come.

How to Block a Person in Teams – A Step-by-Step Guide

Introduction

Microsoft Teams is a widely popular collaboration tool used by individuals and organizations to communicate and work together seamlessly. While Teams offers numerous features to enhance productivity, sometimes it becomes necessary to block a person who is causing disruptions or behaving inappropriately. In this tutorial, we will guide you through the process of blocking someone in Teams, ensuring a safe and pleasant working environment for all team members.

Why Block Someone in Teams?

There are various reasons why you might want to block someone in Teams. Perhaps an individual is repeatedly sending unsolicited messages or trying to disrupt team meetings. In some cases, you may come across someone exhibiting inappropriate behavior or engaging in harassment. Blocking such a person is an effective way to protect yourself and maintain a positive working atmosphere.

Step 1: Open Teams and Access the Chat

First and foremost, launch the Teams application on your device. Once logged in, navigate to the chat window by selecting the appropriate team or the individual you want to block.

Step 2: Locate the Contact Information

To proceed with blocking, you need to access the contact information of the person. In the chat window, click on their name or profile picture to reveal the contact details.Teams Chat Window

Step 3: Choose the Block Option

After accessing the contact information, you will find a small ellipsis icon (three dots) indicating additional options. Click on it to reveal a dropdown menu, where you can select the "Block" option.

Step 4: Confirm Blocking

Once you click on the "Block" option, a confirmation prompt will appear, asking you to confirm your action. Read the prompt carefully to ensure you are blocking the intended person, and then click on "Block" to proceed.

Step 5: Blocked Successfully

Congratulations! You have successfully blocked the person in Teams. They will no longer be able to contact you via direct messages or interact with you in any chat room. However, keep in mind that Teams is a professional platform, and blocking should be reserved for instances where it is truly necessary.

FAQs

Q1: Can a blocked person still see my presence status?

No, once you block someone, they will not be able to view your presence status. This ensures that your availability is not compromised by the blocked individual.

Q2: What happens if I'm in the same team as the blocked person?

Blocking someone in Teams doesn't affect your ability to work together in the same team or participating in common channels and meetings. However, all direct interaction between the two of you will be inhibited.

Q3: Can I unblock someone later if needed?

Yes, you can unblock a person at any time if you decide to give them access to communicate with you again. Simply follow the same steps mentioned earlier and choose the "Unblock" option instead.

Conclusion

Blocking a person in Teams can be an essential step to ensure a harmonious working environment and protect yourself from disruptive or abusive behavior. By following the step-by-step guide outlined in this tutorial, you can easily block someone and regain control over your Teams experiences. Remember, blocking should be used judiciously, primarily in cases where communication has become untenable.

How to Rotate IP Address: A Step-by-Step Tutorial

What is IP Address Rotation?

IP address rotation is the practice of regularly changing your IP address to maintain anonymity and prevent online tracking. By rotating your IP address, you can hide your identity and location, protect your online activities, bypass restricted content, and enhance your overall online security and privacy.

Why is IP Address Rotation Important?

importance of IP address rotationIP address rotation provides several benefits and is crucial for individuals and businesses alike. Here are some key reasons why IP address rotation is important:1. Anonymity: Rotating your IP address helps conceal your real identity, making it harder for malicious entities to track your online activities.2. Prevent Tracking: By frequently changing your IP address, you can prevent websites, advertisers, and other online tracking tools from monitoring your browsing behavior and collecting data about you.3. Enhanced Security: IP address rotation adds an extra layer of security to your online presence, making it difficult for hackers and cybercriminals to target you.4. Bypass Restrictions: Some websites and online services enforce IP-based restrictions, blocking access to specific regions or individuals. By rotating your IP address, you can bypass these restrictions and access blocked content.5. Protect Privacy: Your IP address reveals your approximate location and can expose other personal details. By regularly rotating your IP address, you can safeguard your privacy and reduce the risk of identity theft.

How to Rotate Your IP Address

There are various methods available to rotate your IP address. Here's a step-by-step guide to help you get started:1. Use a VPN (Virtual Private Network): VPNs are one of the most popular tools for IP address rotation. They allow you to connect to a remote server and hide your true IP address behind the server's IP address. This way, your online activities appear as if they are originating from the server's location.2. Proxy Servers: Another option for IP address rotation is using proxy servers. These servers act as intermediaries between your device and the internet. By routing your internet traffic through a proxy server, your IP address is masked, and you can appear as if you are browsing from a different location.3. Tor Network: The Tor network is a free network of volunteer-operated servers that allows users to browse the internet anonymously. By using the Tor browser, your IP address is encrypted and routed through multiple servers, making it nearly impossible to trace your online activities back to your original IP address.4. Mobile Hotspots: If you have access to multiple devices connected to different networks, you can rotate your IP address by switching between them. For example, you can use your smartphone's mobile hotspot and then switch to your home Wi-Fi or another available network to change your IP address.5. IP Rotation Services: There are specialized IP rotation services available that offer a pool of rotating IP addresses. These services typically rotate your IP address automatically at regular intervals or based on specific triggers, providing seamless IP address rotation without any manual intervention.

Best Practices for IP Address Rotation

To optimize the effectiveness of IP address rotation, consider the following best practices:1. Randomize Rotation Frequency: Avoid rotating your IP address at predictable intervals. Instead, randomize the frequency to make it harder for trackers to anticipate your IP address change patterns.2. Check IP Reputation: Before using a new IP address, check its reputation to ensure it is not blacklisted or associated with malicious activities. This will help maintain a good online reputation and reduce the chances of encountering security issues.3. Leverage Multiple Rotation Methods: Combine different IP rotation methods to diversify your online presence and minimize the chances of detection. For example, use a VPN in conjunction with proxy servers or the Tor network for enhanced privacy and security.4. Keep Software Up-to-Date: Ensure that your VPN, proxy server software, or any other IP rotation tools are updated regularly. Outdated software can have security vulnerabilities that may compromise your anonymity and leave you exposed to potential threats.5. Understand Legal Implications: While IP address rotation offers numerous benefits, it's essential to understand the legal implications and comply with local laws and regulations. Ensure that your actions don't violate any terms of service or infringe upon the rights of others.In conclusion, rotating your IP address is an effective method to enhance your online privacy, security, and anonymity. By following the steps outlined in this tutorial and adopting best practices, you can take control of your digital footprint and protect yourself from unwanted tracking and surveillance. Stay safe and enjoy a more private online experience!

How to Turn Off PS5 Adaptive Triggers on PC

Introduction

The PlayStation 5 (PS5) brings immersive gaming experiences to a whole new level with its innovative DualSense controller. One of the standout features is the adaptive triggers, which provide varying levels of resistance based on the actions happening onscreen. While this feature enhances gameplay for many, some players may prefer to turn it off for certain games or when using the PS5 controller on a PC. In this tutorial, we will guide you step-by-step on how to disable the adaptive triggers on your PS5 controller while using it on a PC.

Requirements

Before you proceed, make sure you have the following:1. A PS5 DualSense controller2. A PC with a USB connection3. The latest version of Steam installed on your PC

Step 1: Connect the PS5 Controller to your PC

To begin, connect your PS5 controller to your PC using a USB cable. Plug one end of the cable into the controller and the other end into an available USB port on your computer. The controller should automatically be recognized by your PC.

Step 2: Open Steam and Enable PS5 Controller Support

Launch Steam on your PC and make sure it is up to date. If you don't have Steam installed, you can download it from the official website. Once Steam is open, go to the "Steam" menu in the top-left corner of the window and select "Settings." In the settings menu, navigate to the "Controller" tab and click on "General Controller Settings." Here, enable the "PlayStation Configuration Support" option.

Step 3: Access the Controller Settings

After enabling PlayStation Configuration Support, go back to the main Steam window and click on the "View" menu in the top-left corner. From the dropdown menu, select "Settings" again. This time, choose the "Controller" tab, and then click on "Controller Settings."

Step 4: Customize Controller Configuration

In the Controller Settings window, navigate to the "General Controller Settings" section. Here, you will find options for customizing your controller configuration. Look for the section that displays your connected PS5 controller. Click on it to access the controller configuration options.

Step 5: Turn off Adaptive Triggers

In the controller configuration options, you can disable the adaptive triggers by altering the trigger settings. Locate the triggers on the graphical representation of the controller, and click on them. A dropdown menu will appear with different options. To turn off the adaptive triggers, select the option that disables haptic feedback or vibration for the triggers.PS5 DualSense controller

Troubleshooting

If you encounter any issues with disabling the adaptive triggers on your PS5 controller while using it on a PC, here are a few troubleshooting steps you can try:1. Make sure your PS5 controller is properly connected to your PC via USB.2. Check that you have enabled PlayStation Configuration Support in Steam's controller settings.3. Restart your PC and try the steps again.4. Update the firmware of your PS5 controller to the latest version.5. If all else fails, refer to the official support documentation for the specific game or software you are using.

Conclusion

By following the steps outlined in this tutorial, you can successfully turn off the adaptive triggers on your PS5 controller while using it on a PC. This allows you to customize your gaming experience to suit your preferences and specific game requirements. Remember, enabling or disabling adaptive triggers is reversible, so you can always re-enable them when desired. Embrace the flexibility that the PS5 controller offers and enhance your gaming experience on both console and PC platforms.

How to Download HBO Max on Your Laptop

1. Downloading HBO Max on Your Laptop

To enjoy your favorite HBO shows and movies on your laptop, you need to download HBO Max. Follow these steps to download HBO Max on your laptop:First, open your preferred web browser. It could be Google Chrome, Mozilla Firefox, Microsoft Edge, or any other browser of your choice.Go to the official HBO Max website by typing "www.hbomax.com" in the address bar of your browser. Press Enter.Once you are on the HBO Max website, look for the "Sign In" or "Get HBO Max" button. Click on it to proceed.If you already have an HBO Max account, you can sign in using your credentials. If you don't have an account, you will need to create one by clicking on the "Create Account" or "Get Started" option.Fill in the required details for sign up, such as your name, email address, and a secure password. Accept the terms and conditions, and then click on the "Create Account" button.After signing up or signing in, you will be redirected to the HBO Max homepage. Look for the "Download" button, usually present in the top-right corner of the website. Click on it.HBO Max offers downloads for different operating systems. Since you want to download HBO Max on your laptop, click on the "Download for Laptop" or a similar option.Once you click on the appropriate option, the HBO Max setup file will start downloading. The download process may take a few minutes, depending on your internet speed.After the download completes, locate the setup file on your laptop. It is usually saved in the "Downloads" folder, but you can also find it in the browser's recent downloads section.Double-click on the setup file to start the installation process. Follow the on-screen instructions to complete the installation. It may take a few minutes for HBO Max to install on your laptop.Once the installation is complete, you can launch HBO Max by either clicking on the shortcut created on your desktop or searching for it in the Start menu or applications folder.

Downloading HBO Max on a Laptop (with Images)

hbo max download

2. Using HBO Max on Your Laptop

Now that you have successfully downloaded HBO Max on your laptop, let's explore how to use it and make the most of its features:Launch HBO Max by clicking on the shortcut or searching for it in the Start menu or applications folder.Sign in to your HBO Max account using your registered email address and password.Once you are signed in, you will be greeted by the HBO Max homepage. Here, you will find various categories, such as "Featured," "Originals," "Series," "Movies," and more.To explore the available content, click on the desired category. You can scroll through the options or use the search bar to find a specific show or movie.When you find something you want to watch, click on the thumbnail or title to open its details page.On the details page, you will see a brief synopsis, cast details, and other related information about the show or movie. You can also find options to add it to your watchlist or start playing it immediately.To watch a show or movie, simply click on the "Play" button. HBO Max will start streaming the content, provided you have a stable internet connection.While watching a show or movie, you can pause, rewind, fast forward, or adjust the volume using the playback controls on the player interface.If you want to explore more content recommendations, go back to the HBO Max homepage by clicking on the HBO Max logo or the home button (usually represented by a house icon).HBO Max also offers personalized recommendations based on your viewing history. These recommendations can be found under the "For You" or a similar section.If you want to download a show or movie to watch offline, look for the download button on the details page. Not all content is available for download, but many titles can be enjoyed without an internet connection.To manage your settings, click on your profile icon, usually located in the top-right corner of the HBO Max interface. Here, you can access your account settings, change your profile picture, update your payment information, and more.

Using HBO Max on a Laptop (with Images)

hbo max interfaceIn conclusion, downloading HBO Max on your laptop is a straightforward process. By following the steps mentioned above, you can easily enjoy your favorite HBO content whenever you want. Remember to explore the various categories, personalized recommendations, and offline viewing options available on HBO Max to enhance your streaming experience. Get ready to immerse yourself in a vast library of movies and series delivered by the renowned HBO network!

How to Know When the Roomba J7+ Bag is Full: A Step-by-Step Tutorial

Introduction

Roomba J7+ Bag FullThe Roomba J7+ is a revolutionary robot vacuum that offers a seamless cleaning experience. One of the essential aspects of maintaining your Roomba J7+ is ensuring that its bag is never full. A full bag can impact the vacuum's performance and potentially lead to malfunctions. In this tutorial, we will guide you through the process of knowing when the Roomba J7+ bag is full and how to prevent any issues from arising.

Why is it Important to Monitor the Bag's Level?

Constantly monitoring the Roomba J7+ bag's fullness is crucial to optimize its cleaning efficiency and functionality. Here are a few reasons why keeping track of the bag's level is essential:1. Preventing Overfilled Bags: When the Roomba J7+ bag reaches its maximum capacity, it can impact the vacuum's suction power, resulting in incomplete cleaning and leaving debris behind.2. Avoiding Clogging: A full bag increases the likelihood of clogs occurring in the vacuum's system, hindering its ability to pick up dirt and dust effectively.3. Extending the Vacuum's Lifespan: By regularly checking and emptying the bag when needed, you can prevent any strain on the vacuum's motor, ultimately extending its lifespan.

Steps to Determine When the Roomba J7+ Bag is Full

Follow these simple steps to know when it's time to empty the Roomba J7+ bag:1. LED Indicator:The Roomba J7+ is equipped with a built-in LED indicator that displays the bag's fullness status. This indicator is conveniently located on the device's display panel. The LED light will change color to red or display a "bag full" notification when it's time to empty the bag.2. In-App Notifications:The Roomba J7+ can also send notifications to your smartphone through its dedicated mobile app. This feature allows you to receive alerts when the bag is full or nearing its capacity. Simply ensure that your Roomba J7+ is connected to your Wi-Fi network and that you have the app installed on your device.3. Sensor Technology:The Roomba J7+ utilizes advanced sensor technology to detect when its bag is nearing fullness. These sensors measure the bag's weight and air pressure, providing accurate notifications regarding the bag's status.4. Cleaning Performance:If you notice a decline in your Roomba J7+'s cleaning performance, such as reduced suction power or unfinished cleaning cycles, it may indicate that the bag is full and needs to be emptied.5. Monitoring Frequency:Regularly checking the Roomba J7+ bag's fullness level is recommended to ensure optimal performance. Depending on the frequency and intensity of your cleaning sessions, you may need to empty the bag once every few weeks or months.

Taking Preventive Measures

Roomba J7+ BagTo prevent any complications or interruptions during your cleaning routine, here are some practices to follow:1. Empty the Bag Regularly:Make it a habit to check the Roomba J7+ bag and empty it when necessary. By doing so, you eliminate the risk of overfilled bags impacting the vacuum's performance.2. Keep Spare Bags:Having extra Roomba J7+ bags on hand allows for seamless replacements when the current bag reaches its maximum capacity. Ensure you purchase genuine Roomba bags to maintain optimal performance.3. Clean Filters and Brushes:Regularly clean and maintain the vacuum's filters and brushes as they can contribute to clogging if left unattended. Follow the manufacturer's instructions for proper maintenance.4. Schedule Cleaning Sessions:Plan frequent cleaning sessions based on your specific needs. By scheduling regular cleanings, you reduce the chances of the bag becoming overly full.5. Monitor Cleaning Logs:Refer to the Roomba J7+'s cleaning logs, which can be accessed through the mobile app or the device's display panel. These logs provide insights into the vacuum's performance history, allowing you to identify any trends or issues.

Conclusion

Maintaining awareness of your Roomba J7+ bag's fullness level is essential for uninterrupted cleaning. By following the steps outlined in this tutorial, you can easily determine when it's time to empty the bag and avoid any potential performance complications. Remember to take preventive measures to maximize the lifespan of your Roomba J7+ and keep it operating at its best. Regular maintenance, proper care, and timely bag replacements are the keys to ensuring an optimal cleaning experience with your Roomba J7+.

How Much Does a Strap On Cost: A Comprehensive Guide

Understanding the Different Types of Strap Ons

Before diving into the cost factors, it is essential to familiarize yourself with the different types of strap ons available in the market. This will help you make an informed decision when selecting the right one for you.

1. Double-Ended Strap Ons: These strap ons have a dildo at both ends, allowing both partners to experience pleasure simultaneously. They are commonly used in lesbian or heterosexual couples looking to explore double penetration.

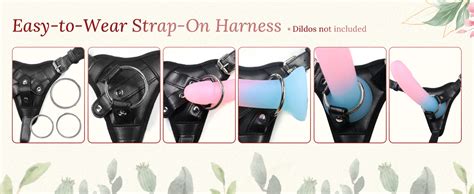
2. Harness Strap Ons: Harness strap ons consist of a dildo that is attached to a harness worn around the waist or hips. This type of strap on provides control and stability during use.

3. Hollow Strap Ons: Hollow strap ons are designed for individuals with erectile dysfunction or those who want to enhance their size. They feature a hollow dildo that can be worn over the penis to provide additional length and girth.

4. Vibrating Strap Ons: As the name suggests, vibrating strap ons have a built-in vibrator that adds an extra level of stimulation for both partners. These are great for those seeking heightened pleasure during their strap on experience.

5. Pegging Strap Ons: Pegging strap ons are specifically designed for couples who enjoy role reversal. The dildo is usually smaller in size and shaped to target the prostate, providing intense pleasure for the receiving partner.

Types of Strap Ons

Factors Affecting the Price of Strap Ons

Now that you have a clear understanding of the different types of strap ons, let's explore the various factors that influence their pricing:

1. Material Quality: Strap ons are available in a range of materials, including silicone, rubber, PVC, and leather. Higher-quality materials often come with a higher price tag due to their durability and hypoallergenic properties.

2. Brand Reputation: Established brands with a reputation for producing high-quality products tend to have higher prices. However, investing in a well-known brand ensures better craftsmanship and customer satisfaction.

3. Size and Features: Strap ons with larger dildos or additional features like adjustable straps or remote-controlled vibrations may cost more. Consider your personal preferences and needs to determine which size and features are worth the investment.

4. Customization Options: Some strap ons offer customization options, such as interchangeable dildos or harnesses. While these options may add to the overall cost, they provide versatility and allow you to tailor your experience to your desires.

5. Extra Accessories: Additional accessories, such as storage bags, cleaning supplies, or lubricants, can sometimes be included with a strap on purchase. These accessories may enhance your overall experience but may also impact the cost.

The Price Range of Strap Ons

Strap On Price

Now that you know what factors go into determining the prices, let's discuss the price ranges you can expect when purchasing a strap on:

1. Budget-Friendly Options ($20-$50): If you're new to strap ons or on a tight budget, there are affordable options available within this price range. These strap ons may have basic features and be made of lower-quality materials, but they can still provide satisfactory experiences.

2. Mid-Range Options ($50-$100): In the mid-range price bracket, you can find strap ons with better materials, more features, and improved designs. These options offer a balance between quality and affordability, making them popular choices among users.

3. High-End Options ($100 and above): High-end strap ons are usually crafted from premium materials and offer advanced features and customization options. These strap ons are designed for those seeking the highest quality, durability, and pleasure.

Tips for Buying a Strap On

When purchasing a strap on, keep the following tips in mind:

1. Consider Your Experience Level: If you're new to strap ons, start with a basic, budget-friendly option to gauge your interest before investing in a higher-priced one.

2. Read Reviews: Before purchasing a strap on, read customer reviews to gain insights into its performance, quality, and durability. This can help you choose the right strap on for your needs.

3. Measure for the Perfect Fit: Ensure the harness or dildo measurements align with your preferences and the preferences of your partner to guarantee a comfortable and pleasurable experience.

4. Set a Budget: Determine how much you're willing to spend and explore options within that price range. Remember to prioritize the features that are most important to you.

Conclusion

Strap ons offer a thrilling and enjoyable experience for couples exploring new avenues of pleasure. The cost of a strap on can vary depending on factors such as material quality, brand reputation, size, features, customization options, and additional accessories included. By understanding these factors and considering your preferences, you can make an informed decision when selecting the perfect strap on within your budget. Remember to prioritize quality and comfort to ensure a satisfying experience.

Semantic keywords: strap on cost, strap on pricing, types of strap ons, strap on price range, buying a strap on

Car Issues TV Show Cancelled: A Guide to Dealing with Common Car Problems

Introduction

In recent news, the popular car issues TV show has been unexpectedly cancelled, leaving many car enthusiasts and regular viewers disappointed. This show was well-known for its informative content, where experts tackled various car problems and provided solutions. The cancellation has left a void in the automotive community, as viewers now seek alternative sources to stay informed about their own car issues. However, fret not, as this tutorial article aims to guide you through the process of handling common car problems, ensuring you can still troubleshoot and fix your vehicle effectively.

Understanding Common Car Problems

common car problemsOne of the key steps to effectively dealing with car issues is to first understand the common problems that vehicle owners encounter. By being aware of these issues, you can readily identify symptoms and take appropriate action. Some prevalent car problems include engine misfires, battery failure, overheating, brake problems, and electrical issues. Each of these problems requires a different set of troubleshooting steps and solutions. Maintaining a basic understanding of these problems will help you save time and money at the repair shop.

Engine Misfires - A Troubleshooting Guide

When your vehicle's engine misfires, it can cause a rough running, lack of power, or even stalling. Identifying the source of an engine misfire can be challenging, but it's essential to diagnose and resolve the problem promptly. Begin by checking the spark plugs, ignition coils, and fuel injectors. Ensure that these components are clean and functioning correctly. If necessary, replace faulty parts to restore your engine's performance.

Overheating: Causes and Solutions

engine overheatingEngine overheating is a common problem that can lead to significant damage if not addressed promptly. Several factors can contribute to an overheating engine, such as a malfunctioning thermostat, low coolant levels, a faulty radiator fan, or a clogged radiator. It is crucial to maintain proper coolant levels and regularly inspect the cooling system components. Additionally, promptly replacing a faulty thermostat or radiator fan can help prevent engine overheating and potential damage to your vehicle's engine block.

Battery Failure - Signs and Solutions

A dead or weak battery is a frustrating issue that can leave you stranded when you need your vehicle the most. Understanding the signs of a failing battery can help you take preventive measures before it fails completely. Look out for symptoms such as slow cranking, dimming headlights, or frequent jump-starts. If you notice any of these signs, it's time to replace your battery. Additionally, ensuring proper battery maintenance and regularly checking the charging system can help prevent unexpected battery failures.

Brake Problems: Troubleshooting and Maintenance

brake problemsBrakes are a critical safety component of any vehicle, and experiencing problems in this area can be alarming. Common brake problems include squealing or grinding noises, a soft brake pedal, or a pulsating sensation when applying the brakes. Begin by inspecting the brake pads and rotors for excessive wear or damage. Replace any worn-out components to restore optimal braking performance. Regular brake maintenance, including fluid checks and pad replacements, can help prevent costly repairs and ensure your safety on the road.

Dealing with Electrical Issues - Tips and Solutions

Electrical issues in cars can range from non-functioning power windows and faulty central locking systems to complete electrical failures. These problems can be daunting, but with a systematic approach, you can troubleshoot them effectively. Start by checking the fuses related to the malfunctioning electrical component and ensure they are intact. If the issue persists, inspect the wiring and connectors, looking for any signs of damage or loose connections. Consulting your vehicle's manual or seeking professional help may be necessary when dealing with intricate electrical systems.

Conclusion

While the cancellation of the car issues TV show may have created a void in your automotive knowledge, this tutorial article aimed to bridge that gap by providing information on common car problems and their solutions. By understanding these issues and implementing the troubleshooting steps mentioned, you can confidently address and resolve various car problems. Remember, while professional assistance is always available, knowing how to handle common car issues empowers you to save time and money, keeping your vehicle in top shape. So, gear up and take control over your car problems!

Aqua Care Shower Head Review: Ultimate Guide to a Luxurious Shower Experience

What is Aqua Care Shower Head?

The Aqua Care Shower Head is a top-notch product designed to revolutionize your shower experience. With its advanced features and modern design, this shower head provides the perfect combination of high-pressure water flow and water conservation. If you are tired of your current shower experience, the Aqua Care Shower Head is the ultimate solution.

The Benefits of Using Aqua Care Shower Head

Benefits of Aqua Care Shower HeadExperience an array of remarkable benefits by installing the Aqua Care Shower Head in your bathroom. Here are the key advantages that make this shower head stand out:1. High-Pressure Water Flow: The Aqua Care Shower Head ensures a powerful and invigorating shower experience. Enjoy the feeling of a spa-like water massage every time you step into your shower.2. Water Conservation: The innovative design of the Aqua Care Shower Head incorporates water-saving features without compromising the quality of your shower experience. Save water and contribute towards a more sustainable future.3. Easy Installation: Installing the Aqua Care Shower Head is a breeze. With no special tools required, you can effortlessly replace your old shower head with the Aqua Care model. No plumbing skills needed!4. Customizable Settings: The Aqua Care Shower Head offers adjustable spray options, allowing you to customize your shower experience according to your preferences. Choose from a relaxing rain shower or a high-pressure massage, all at your fingertips.5. Simple Maintenance: Cleaning the Aqua Care Shower Head is hassle-free. The anti-clog nozzles prevent mineral buildup, making it easier to maintain a clean and hygienic shower head. Just wipe away any accumulated residue, and it's good as new!

How to Install Aqua Care Shower Head

Installing the Aqua Care Shower Head is a straightforward process that anyone can accomplish. Here's a step-by-step guide to help you get started:1. Gather the Materials: Before you begin, ensure you have all the tools necessary for installation. These typically include a wrench, plumber's tape, and the Aqua Care Shower Head itself.2. Remove the Old Shower Head: Use the wrench to loosen and remove the existing shower head. Be careful not to damage any plumbing during this process.3. Apply Plumber's Tape: Wrap a few layers of plumber's tape around the exposed threading on the shower arm. This helps create a watertight seal once you attach the Aqua Care Shower Head.4. Attach the Aqua Care Shower Head: Gently screw the Aqua Care Shower Head onto the shower arm. Use your hand to tighten it securely, ensuring there are no leaks.5. Test the Shower Head: Turn on the water to check if the Aqua Care Shower Head is functioning properly. Make adjustments to the spray settings if necessary.6. Enjoy your Luxurious Shower: Step inside your shower and experience the invigorating water flow of the Aqua Care Shower Head. Indulge in a luxurious and revitalizing shower every day!

Additional Tips for Maximizing Aqua Care Shower Head Performance

For optimal results and a long-lasting shower head, consider the following tips:1. Regular Cleaning: To prevent mineral buildup and ensure consistent water flow, clean the Aqua Care Shower Head regularly. Simply wipe it with a mild cleaner and soft cloth to remove any residue.2. Check for Leaks: Occasionally inspect the shower head for any leaks. If you notice any drips or leaks, tighten the connections or replace any faulty parts.3. Adjust Spray Patterns: Experiment with the different spray settings of the Aqua Care Shower Head to find the one that suits your preferences. Whether you prefer a gentle mist or a powerful massage, the Aqua Care Shower Head has options for everyone.4. Maintain Water Pressure: If you experience low water pressure, check if there are any clogs in the shower head. Remove any debris or mineral deposits that may obstruct the water flow.5. Keep the Shower Area Dry: After every use, ensure the shower area is dry. This prevents any moisture-related issues and extends the lifespan of your Aqua Care Shower Head.

Conclusion

Upgrade your shower experience with the Aqua Care Shower Head. With its superior features, water-saving capabilities, and easy installation process, this shower head is a game-changer. Transform your daily routine into a relaxing spa-like experience and enjoy the benefits of a high-pressure water flow while contributing towards water conservation. Say goodbye to dull showers and hello to the ultimate luxurious shower experience with Aqua Care Shower Head!

How to Watch TNT on PS5

Setting Up Your PS5 for TNT Streaming

To watch TNT on your PS5, you will need to follow a few simple steps to set up your console for streaming. First, ensure that your PS5 is connected to a stable internet connection. This can be done through a wired Ethernet connection or a Wi-Fi connection. Once you are connected, navigate to the PlayStation Store on your PS5.

Downloading the TNT App

To stream TNT on your PS5, you will need to download the TNT app from the PlayStation Store. The TNT app is available for free and can be found in the "Apps" section of the store. Open the PlayStation Store and search for the TNT app. Once you find it, select "Download" to begin the installation process. Wait for the app to download and install on your PS5.

Logging In to the TNT App

After the TNT app is installed, you will need to log in using your TNT account. If you don't have an account, you can create one for free on the TNT website. Launch the TNT app on your PS5 and select "Login" or "Sign In." Enter your TNT account credentials, such as your email address and password. Once logged in, you will have access to all the TNT content on your PS5.

Navigating the TNT App on PS5

Once you have logged in, you will see the TNT app's main screen on your PS5. This screen will display featured shows and movies, as well as various categories to browse through.To find a specific show or movie, you can use the search function within the app. Simply enter the title in the search bar using the on-screen keyboard. You can also browse through different genres and categories to discover new content on TNT.

Watching TNT on PS5

To start streaming a show or movie on TNT, simply select the desired content and click on it. You will be taken to a page with more information about the selected item, including a brief synopsis, its rating, and other relevant details.On this page, you will find the option to play the selected content. Click on the play button to start streaming the show or movie on your PS5. You can control playback using the on-screen controls, similar to any other streaming app on the console.Remember to check your internet connection to ensure smooth streaming. If you encounter any issues with buffering or playback, try restarting your PS5 or troubleshooting your internet connection.

Conclusion

In conclusion, watching TNT on your PS5 is a straightforward process. By setting up your console for streaming, downloading and logging into the TNT app, and navigating the app's interface, you can enjoy all the TNT content on your PS5. Whether you want to catch up on your favorite shows or discover new series and movies, the TNT app on PS5 provides a convenient and user-friendly way to stream your favorite TNT content. Start streaming TNT on your PS5 today and enjoy a seamless entertainment experience.watching tnt on ps5

How Long is a Box Spring Good For? A Comprehensive Guide

Understanding Box Springs: A Brief Overview

box springWhen it comes to mattresses, a box spring is an essential component that often goes unnoticed. A box spring is a supportive foundation that sits beneath the mattress, providing stability and enhancing comfort. It consists of a wooden frame with springs or a modern grid system, covered by fabric to create a seamless base. While often overlooked, the question of how long a box spring should last is crucial for maintaining optimum sleep quality and mattress longevity. In this comprehensive guide, we will explore the lifespan of a box spring and various factors that contribute to its durability.

Factors Affecting the Lifespan of a Box Spring

factors affecting box spring lifespanSeveral factors determine the longevity of a box spring. Understanding these variables will help you make informed decisions to maximize its durability and overall performance. Let's delve into the key factors affecting the lifespan of a box spring.

Quality of Materials

box spring quality materialsThe quality of materials used in the construction of a box spring plays a significant role in determining its lifespan. A box spring made with high-quality, durable materials like solid wood, strong steel springs, and sturdy polyester fabric coverings is likely to last longer than one constructed with inferior components. Investing in a box spring with superior materials ensures greater durability and extended use.

Frequency of Use

frequency of use box springAnother vital factor that affects the lifespan of a box spring is the frequency of use. A box spring used daily will endure more wear and tear compared to one used sporadically. Additionally, the weight and movement patterns of sleepers can contribute to the wearing out of a box spring over time. To extend the lifespan of your box spring, be mindful of its usage frequency and consider rotating or flipping the mattress periodically for balanced wear.

Proper Maintenance and Care

proper maintenance box springJust like any other household item, regular maintenance and care are crucial for preserving the lifespan of a box spring. Vacuuming the fabric covering to remove dust and debris, promptly addressing any stains or spills, and ensuring the box spring is adequately supported by a sturdy bed frame are all essential practices. Additionally, avoiding jumping or placing excessive weight on the box spring can prevent premature deterioration. Taking these maintenance measures will help prolong the lifespan of your box spring.

Environmental Factors

environmental factors box springEnvironmental factors such as humidity levels, temperature variations, and exposure to sunlight can impact the durability of a box spring. Excessive moisture can cause mold or mildew growth, and extreme temperature fluctuations can weaken the materials over time. Ideally, keep your box spring in a well-ventilated room with moderate humidity levels. Shielding it from direct sunlight and extreme temperature changes will help maintain its integrity.

Signs Indicating It's Time to Replace Your Box Spring

replace box springUltimately, every box spring has a shelf life. Recognizing the signs that indicate it's time for a replacement is essential for your comfort and sleep quality. Here are some common indications that your box spring is no longer providing adequate support:1. Sagging or uneven surface: If the box spring sags or has an uneven surface, it can negatively impact the support and comfort of your mattress.2. Squeaking or creaking noises: Excessive noise when you move on your bed is a clear sign of worn-out springs or loose joints.3. Visible damage: Visible wear and tear, such as broken or protruding springs, torn fabric, or damaged frame, indicate the need for a new box spring.4. Allergies or respiratory issues: If you find yourself experiencing allergy symptoms or respiratory problems that seem to improve when away from your bed, it could be due to an old box spring harboring allergens.5. Age: On average, a box spring may last anywhere between 8 to 10 years. If your box spring is reaching or surpassing this timeframe, it is likely time for a replacement.

Conclusion

In conclusion, the longevity of a box spring depends on various factors such as the quality of materials used, frequency of use, proper maintenance, and exposure to environmental factors. By considering these factors and recognizing the signs of wear and tear, you can determine when it's time to replace your box spring. Remember, a well-maintained and supportive box spring is crucial for ensuring the overall comfort, support, and durability of your mattress.

How Large is a Polaroid Picture?

Understanding the Dimensions of a Polaroid Picture

Polaroid pictures have always been a favorite among photographers and enthusiasts for their unique charm and instant gratification. However, determining the exact dimensions of a polaroid picture can be a bit confusing, especially with the availability of different polaroid formats. In this tutorial, we will explore the various sizes of polaroid pictures and discuss their dimensions, allowing you to make informed choices when capturing memorable moments.

Standard Polaroid Picture Size

Standard Polaroid SizeWhen most people think of polaroid pictures, they envision the classic square format which measures approximately 3.1 inches by 3.1 inches (7.9 cm by 7.9 cm). This standardized size offers a balanced composition and remains the most popular choice for capturing instant memories. Its compactness makes it easy to carry and display, making it a go-to option for everyday photography.

Wide Format Polaroid Picture Size

Wide Polaroid SizeFor those seeking a broader perspective, wide format polaroid pictures are an excellent choice. With dimensions of around 4.2 inches by 3.5 inches (10.7 cm by 9 cm), these wider polaroids offer a unique canvas for your creative compositions. The increased width allows for more spacious shots, enabling you to capture expansive landscapes or group photos. The wider format can add a sense of grandeur to your images, making them truly stand out.

Mini Polaroid Picture Size

Mini Polaroid SizeMini polaroid pictures are perfect for those who prefer a more compact and portable option. Measuring approximately 2.1 inches by 3.4 inches (5.3 cm by 8.6 cm), these smaller polaroids are ideal for capturing quick snapshots or creating photo collages. Despite their diminutive size, mini polaroids can still deliver impressive image quality, making them a versatile choice for capturing memories on the go.

Square vs. Rectangle: Choosing the Right Polaroid Picture Size

Square vs. RectangleThe decision between square or rectangular polaroid pictures ultimately depends on your artistic vision and the subject you wish to capture. The square format offers a balanced and timeless aesthetic, making it suitable for various subjects, including portraits, still life, or capturing candid moments. On the other hand, rectangular polaroid pictures can better accommodate wide landscapes, architectural shots, or larger group photos. Consider the composition and the story you want to convey before deciding on the format that best suits your needs.

Choosing the Right Polaroid Camera

Choosing the Right Polaroid CameraTo enjoy the magical process of capturing polaroid pictures, it's essential to choose the right polaroid camera. Many instant cameras are available in the market, each supporting specific film formats and sizes. Ensure that the camera you choose is compatible with the polaroid format you desire, be it standard, wide, or mini. Additionally, consider factors such as ease of use, built-in features, and the overall camera design to find the perfect match for your photography style.In conclusion, the dimensions of a polaroid picture can vary depending on the format chosen. The standard square format, measuring approximately 3.1 inches by 3.1 inches, remains the most popular choice for its balanced composition. Wide format polaroids, measuring around 4.2 inches by 3.5 inches, provide a wider canvas for capturing expansive shots. Mini polaroids, with dimensions of approximately 2.1 inches by 3.4 inches, offer a compact and portable option for quick snapshots. By understanding the various sizes and formats available, you can make informed decisions when choosing the perfect polaroid picture size to capture your precious memories.

How to Use the Tracker in Final Cut Pro: A Comprehensive Tutorial

Introduction

Final Cut Pro is a powerful video editing software that offers a wide range of tools and features to enhance your video projects. One of the most valuable tools available in Final Cut Pro is the Tracker, which allows you to add motion tracking to your footage. Motion tracking is especially useful when you want to add text, graphics, or effects that follow a moving object or person in your video. In this tutorial, we will guide you through the process of using the Tracker in Final Cut Pro, step by step.

Getting Started

To begin using the Tracker in Final Cut Pro, you need to have the software installed on your computer. Launch Final Cut Pro and import the footage you want to work with into your project.Getting Started

Setting the Tracking Reference

Before you can track an object or person in your video, you need to set a tracking reference point. This reference point will be used by Final Cut Pro to track the movement of the object or person throughout the video.To set the tracking reference, follow these steps:1. Select the clip in your timeline that contains the object or person you want to track.2. Go to the "Video" menu and select "Show Video Animation" (or simply press Option+4).3. In the video animation editor, you will see a panel with various parameters. Locate the parameter called "Tracker" and click on the "+" icon next to it to expand the options.4. Click on the "Analyze for" dropdown menu and choose the type of tracking you want to perform, such as position, scale, rotation, or even color.5. Move the playhead to the beginning of the clip where you want to start tracking.6. Click on the "Set Start Reference" button to set the tracking reference point.

Tracking the Object or Person

Once you have set the tracking reference, you can proceed to track the object or person in your video. Follow these steps to do so:1. Make sure the playhead is positioned at the beginning of the clip.2. Click on the "Track Forward" button to start tracking. Final Cut Pro will analyze the movement of the object or person and track it throughout the video.3. You can monitor the progress of the tracking by keeping an eye on the tracker area. If the tracker deviates from the desired path, you can manually adjust it by clicking and dragging the tracker on the video preview.4. If you reach a point in the video where the desired object or person is no longer available, click on the "Track Backward" button to track it in reverse.5. Continue tracking until the end of the clip.

Applying Effects or Text to the Tracked Object

Now that you have successfully tracked the object or person in your video, it's time to apply effects or text that will follow its movement. Here's how:1. Select the clip in your timeline that contains the tracked object or person.2. Go to the "Effects" browser and choose the effect or text you want to apply.3. Drag and drop the effect or text onto the clip in your timeline.4. Position and resize the effect or text as desired.5. If needed, adjust the keyframes of the effect or text to match the movement of the tracked object or person.

Conclusion

Using the Tracker in Final Cut Pro opens up a world of possibilities for adding dynamic and engaging elements to your videos. With the step-by-step guidance provided in this tutorial, you should now be equipped with the knowledge and skills to effectively use the Tracker feature in Final Cut Pro. Experiment with different effects and techniques to take your video editing to the next level. Happy tracking!

How to Use the Anycubic 3D Printer: A Step-by-Step Tutorial

Setting Up the Anycubic 3D Printer

Anycubic 3D Printer setupThe Anycubic 3D printer is a versatile and user-friendly device that allows you to bring your digital designs to life. Whether you are a beginner or an experienced user, this tutorial will guide you through the process of setting up and using the Anycubic 3D printer effectively.To begin, carefully unpack the Anycubic 3D printer and ensure that all the required components are included. These components typically consist of the printer itself, the power supply, the filament spool holder, the filament, the build platform, and the necessary cables.Once you have verified all the components, proceed to find a suitable location for your 3D printer. It is essential to have a stable and clean surface to place the printer on. Additionally, ensure that there is sufficient space around the printer for the printing process and filament spool movement.Next, connect the power supply to the printer and plug it into a reliable power outlet. Power on the device by pressing the power button, usually located on the front or side of the printer. As the printer boots up, you should see the display screen come to life, indicating that the printer is ready for use.

Calibrating the Anycubic 3D Printer

Anycubic 3D Printer calibrationBefore you start printing, it is crucial to calibrate the Anycubic 3D printer to ensure optimal printing results. Begin by leveling the build platform. Most 3D printers, including the Anycubic, have a manual leveling process. This involves tweaking the different corners of the platform to achieve a balanced and even surface.To level the build platform, navigate to the printer's menu and locate the "Level Bed" option. Follow the on-screen instructions to make the necessary adjustments. It is essential to repeat this process regularly to maintain consistent printing quality.Once the build platform is properly leveled, the next step is to calibrate the printer's extruder. This process ensures that the filament is properly fed into the printer for accurate printing. First, heat the printer's extruder to the recommended temperature for your filament type. Then, insert the filament into the extruder and wait for it to smoothly flow out of the nozzle. Adjust the tension of the filament feeder if necessary.

Preparing and Loading the Filament

Anycubic 3D Printer filamentWith the Anycubic 3D printer calibrated, it's time to prepare and load the filament for printing. Start by selecting the appropriate filament type for your project. Ensure that the filament matches the printer's specifications and is compatible with the chosen printing settings.Next, locate the filament spool holder and mount it onto the printer. Attach the filament spool to the holder, making sure that it rotates freely without any obstructions. Feed the filament through the filament guide tube and into the printer's extruder.On the printer's menu, navigate to the filament loading options and select the desired filament type. Follow the on-screen prompts to start the filament loading process. The printer will heat up the extruder to the appropriate temperature and then automatically feed the filament through.

Printing with the Anycubic 3D Printer

Anycubic 3D Printer printingNow that the Anycubic 3D printer is set up, calibrated, and the filament is loaded, it's time to start printing. There are various ways to print with the Anycubic 3D printer, depending on your workflow and design files.One common method is to use slicing software, such as Cura or Simplify3D, to prepare your 3D models for printing. These software applications allow you to customize settings such as layer height, print speed, and support structures. Import your 3D model into the software, adjust the necessary settings, and generate the G-code file.Transfer the G-code file to an SD card or connect the printer to your computer via USB, depending on the printer's capabilities. Navigate to the file menu on the printer's display screen and select the G-code file you wish to print. Follow the on-screen instructions to start the printing process.During the printing process, it is essential to monitor the printer closely, especially during the initial layers. Occasionally check that the print adheres properly to the build platform and that there are no issues with the filament flow. If any anomalies arise, pause the print and address the problem before proceeding.

Troubleshooting and Maintenance of the Anycubic 3D Printer

Anycubic 3D Printer maintenanceAs with any device, the Anycubic 3D printer may encounter occasional issues or require routine maintenance. Troubleshooting and maintenance play a vital role in ensuring the printer's long-term performance and print quality.Common issues that may arise include filament jams, leveling inconsistencies, or software-related problems. The Anycubic website and user manual provide detailed guides on addressing these issues. Additionally, online communities and forums dedicated to 3D printing can be excellent resources for troubleshooting.Regular maintenance involves cleaning the print bed, lubricating moving parts, and periodically checking for loose screws or belts. Remember to power off the printer and unplug it before performing any maintenance activities. Following the manufacturer's guidelines for maintenance intervals is crucial to keep your Anycubic 3D printer in optimal condition.In conclusion, the Anycubic 3D printer offers an accessible and intuitive solution for bringing your digital designs to life. By following this tutorial and familiarizing yourself with the printer's features and settings, you can unleash your creativity and enjoy the world of 3D printing. Remember to always adhere to safety guidelines and experiment with different materials and designs to maximize the potential of your Anycubic 3D printer.

How to Xray a Photo on iPhone: A Step-by-Step Tutorial

1. Understanding Xray Photography

Xray photography is a fascinating technique that allows you to see through objects and capture hidden details. With advancements in mobile phone technology, it is now possible to xray photos directly from your iPhone. In this tutorial, we will guide you through the process of xraying a photo on your iPhone and reveal the secrets hidden within.

2. Selecting the Right App

To begin with, you need to choose a suitable app from the App Store that offers xray functionality. There are several options available, such as "Xray Scanner Prank" or "Xray Camera Scanner", which simulate the xray effect on your photos. Once you have found and downloaded your preferred app, it's time to move on to the next step.

iphone xray

3. Importing the Photo

Launch the xray app on your iPhone and locate the option to import a photo. This can usually be found within the app's main interface or under a specific menu. Tap on the import button and navigate to the photo you want to xray. Select the photo and wait for it to load into the xray app.

4. Applying the Xray Effect

Once your photo is imported into the app, you will typically find a range of editing tools and effects available. Look for a specific xray filter or effect among these options. Enable the xray effect and adjust the settings if necessary to achieve the desired level of transparency. Remember that different apps may have varying interfaces, but the overall process remains similar.

5. Fine-tuning and Enhancing the Result

After applying the xray effect, take a closer look at your photo. You may notice that some areas are more transparent than others, while others might not have changed at all. To fine-tune the xray effect, most apps provide additional tools such as sliders or brushes. Use these tools to refine the transparency of specific areas, making them more or less visible as needed.

6. Saving and Sharing the Xray Photo

Once you are satisfied with the xray effect on your photo, it's time to save and share your creation. Look for the save or export option within the app, usually located in the lower-right corner of the screen. Select the desired image quality and file format, then save the xray photo to your iPhone's camera roll or gallery.

7. Applying Xray Effect to Live Camera Feed

Some xray apps also offer the exciting ability to apply the xray effect in real-time to live camera feeds. This feature allows you to see the world around you as if it had an xray filter applied. To use this feature, switch to the live camera mode within the app and experiment with different objects and environments to witness the xray effect in action.

8. Precautions and Legal Considerations

While xray photography can be a fun and creative way to explore your surroundings, it is important to consider ethical and legal implications. Ensure that you use this technique responsibly and respect the privacy of others. Always follow the laws and regulations of your jurisdiction regarding photography and image manipulation. Remember that xray apps on your iPhone are intended for entertainment purposes only.

Conclusion

Xraying a photo on your iPhone can unlock hidden details and provide a unique perspective on the world around us. With the right app and a few simple steps, you can transform ordinary photos into intriguing xray images. However, always remember to use this technique responsibly and consider the ethical and legal implications. Now, go ahead and explore the exciting world of xray photography right on your iPhone!

Semantic Keywords: xray photography, xray effect, iPhone xray app, image transparency, real-time xray, ethical considerations in xray photography.