1. Setting up the Quest 2 for TV connectivity
The first step in connecting your Quest 2 to a Samsung TV is to ensure that the necessary settings are configured on your VR headset. Follow these steps to prepare your Quest 2 for TV connectivity:1. Put on your Quest 2 headset and navigate to the "Settings" menu.2. Scroll down and select the "Device" tab.3. Choose "Virtual Desktop" from the list of options.4. Enable the "Stream to TV" setting by toggling it on.
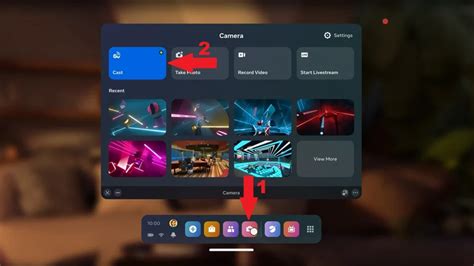
2. Connecting the Quest 2 to the Samsung TV using Chromecast
To connect your Quest 2 to your Samsung TV, you can use Chromecast. Here's how you can set it up:1. Ensure that your Samsung TV and Chromecast device are both connected to the same Wi-Fi network.2. Plug the Chromecast device into an available HDMI port on your Samsung TV.3. Turn on your Samsung TV and switch to the appropriate HDMI input.4. Open the Oculus app on your smartphone and tap on the casting icon at the top right corner of the screen.5. Select your Chromecast device from the list of available devices.6. The content from your Quest 2 should now be mirrored on your Samsung TV.
3. Using an HDMI cable to connect the Quest 2 to the Samsung TV
Another method to connect your Quest 2 to your Samsung TV is by using an HDMI cable. Follow these steps to establish the connection:1. Locate the HDMI port on both your Quest 2 headset and Samsung TV.2. Plug one end of the HDMI cable into the HDMI port on your Quest 2.3. Connect the other end of the HDMI cable to an available HDMI input on your Samsung TV.4. Turn on your Samsung TV and switch to the corresponding HDMI input.5. Your Quest 2 display should now be visible on your Samsung TV screen.
4. Troubleshooting common issues
Sometimes, you may encounter issues while connecting your Quest 2 to your Samsung TV. Here are a few common problems and their solutions:1. No audio on the TV: Ensure that the volume on both your Quest 2 and Samsung TV is turned up. You can also try disconnecting and reconnecting the HDMI cable.2. Lag or latency issues: Check the Wi-Fi connection on your Chromecast device and Quest 2. Moving closer to the router or using an Ethernet connection can help improve the connection quality.3. Quest 2 not being detected: Restart both your Quest 2 and Samsung TV, and ensure that they are both connected to the same Wi-Fi network. Additionally, make sure that you have the latest firmware updates installed on both devices.
5. Enjoying VR content on the Samsung TV
Once you have successfully connected your Quest 2 to the Samsung TV, you can enjoy immersive VR content on a larger screen. Whether it's gaming or watching videos, here are a few tips to enhance your experience:1. Adjust the TV settings: Use your Samsung TV's picture settings to optimize the viewing experience for VR content. Experiment with settings like brightness, contrast, and color to find the best visuals.2. Clear your play area: Ensure that your VR play area is clear of any obstacles that may obstruct your movements while playing VR games.3. Use headphones for audio: For a more immersive experience, consider connecting headphones directly to your Quest 2 to enhance the audio quality.In conclusion, connecting your Quest 2 to a Samsung TV opens up a whole new world of possibilities for experiencing VR content. By following the steps outlined in this tutorial, you can easily connect your Quest 2 to your Samsung TV using either Chromecast or an HDMI cable. Troubleshoot any common issues that may arise and optimize your settings for a more immersive VR experience. Start enjoying VR content on a larger screen today!
No comments:
Post a Comment