1. Locking Messages on MacBook: Why Is It Important?
In this digital age, privacy and security have become paramount. With the increasing reliance on technology, our personal information is more vulnerable than ever. Protecting your messages on your MacBook is crucial to safeguarding sensitive conversations from prying eyes. By following the steps below, you can learn how to lock messages on your MacBook effectively.
2. Understanding the Message Locking Process
To lock your messages on MacBook, you need to take advantage of the built-in security features offered by the operating system. By employing a password or Touch ID, you can prevent unauthorized access to your messages. It's essential to set up a strong, unique password or enable Touch ID before proceeding with the locking process.
To set up a strong password on your MacBook, navigate to System Preferences > Users & Groups. From there, click on the lock icon on the bottom left corner of the window. Enter your administrator password and select the user account that you wish to set a password for. Finally, click on the "Change Password" button to set a secure password.
3. Locking Messages using the Messages App
To lock your messages using the Messages app on your MacBook, follow the steps below:1. Open the Messages app on your MacBook by clicking on the Messages icon in the Dock or by searching for it using Spotlight.2. Once the Messages app is open, navigate to the menu bar and click on "Preferences".3. In the Preferences window, click on the "Accounts" tab.4. Select your iMessage account from the list on the left side of the window.5. Tick the checkbox next to "Enable this account" if it is not already selected.6. Click on the "Security" tab.7. Check the box next to "Require password" to lock your messages.8. Enter the password for your user account and click on "OK" to save the changes.By following these steps, you have successfully locked your messages on your MacBook using the Messages app.
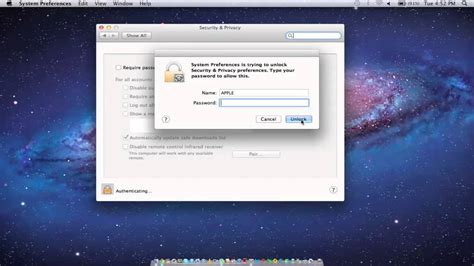
4. Additional Security Measures to Protect Your Messages
While locking your messages using the built-in security features is a great start, there are additional measures you can take to enhance the security of your messages on your MacBook:1. Enable FileVault: FileVault is a powerful encryption tool provided by macOS that can encrypt your entire disk, including your messages. To enable FileVault, navigate to System Preferences > Security & Privacy > FileVault and click on the lock icon to make changes.2. Use a Secure Messaging App: Consider using a third-party messaging app that offers end-to-end encryption for an extra layer of security. Apps like Signal and WhatsApp are known for their strong encryption protocols.3. Regularly Update macOS: Keeping your operating system up to date ensures that you have the latest security patches and bug fixes. To update macOS, go to the Apple menu > System Preferences > Software Update.
5. Conclusion
In conclusion, ensuring the privacy and security of your messages on your MacBook is of utmost importance. By following the steps outlined in this tutorial, you can easily lock your messages using the built-in features of your MacBook. Additionally, implementing additional security measures, such as enabling FileVault and using secure messaging apps, further protects your messages from unauthorized access. By taking these precautions, you can have peace of mind knowing that your conversations remain private and secure.
No comments:
Post a Comment