How to Print Your Venmo QR Code: A Step-by-Step Tutorial
How to Get the Lionel Armor Set in Lion's Arch
Introduction
The Lionel Armor Set is one of the most sought-after armor sets in the game Lion's Arch. This powerful set provides players with enhanced defense and unique buffs that can greatly improve their gameplay experience. In this tutorial, we will guide you through the process of obtaining the Lionel Armor Set and explain how to make the most of its capabilities.Step 1: Finding the Quest
To start your journey towards obtaining the Lionel Armor Set, you need to find the quest that unlocks it. Head to the Lion's Arch city center and look for the NPC named Lionel. He can usually be found near the town's marketplace. Speak to Lionel to initiate the questline that will lead you to your desired armor set.Step 2: Completing the Questline
Lionel will entrust you with a series of tasks that you need to complete to prove your worthiness for the Lionel Armor Set. These tasks may include defeating powerful enemies, collecting rare materials, or solving intricate puzzles. Be prepared for challenging encounters and be sure to utilize your skills and equipment wisely.Step 3: Gathering the Required Materials
Once you have successfully completed the questline, Lionel will provide you with a detailed list of the materials required to craft the Lionel Armor Set. The list may include rare ores, gems, or monster drops. Plan your resource gathering expeditions accordingly and embark on adventures to acquire all the necessary materials.Step 4: Crafting the Lionel Armor Set
After gathering all the required materials, head to a blacksmith or a crafting station within Lion's Arch. Interact with the crafting interface and select the Lionel Armor Set recipe. Use the gathered materials to craft each piece of the armor set individually. Remember to carefully follow the recipe instructions to ensure the success of your crafting endeavor.Step 5: Enhancing Your Armor Set
Congratulations on successfully crafting the Lionel Armor Set! However, the journey doesn't end here. To make the most of your newfound gear, you need to enhance it further. Lion's Arch offers various enhancement options, such as enchantments, gem socketing, and upgrading. Experiment with different enhancement combinations to optimize your armor's stats and abilities.Conclusion
Obtaining the Lionel Armor Set in Lion's Arch may require dedication, skill, and resourcefulness, but the rewards are well worth the effort. This powerful armor set will provide you with additional defense, buffs, and a stylish appearance. Follow the steps outlined in this tutorial to embark on an exciting adventure and obtain the Lionel Armor Set for yourself. Arm yourself with the finest gear and conquer the challenges that await in Lion's Arch!How Accurate is HRV on Fitbit: A Comprehensive Guide
What is HRV?
Heart rate variability (HRV) refers to the variation in time between consecutive heartbeats. It is a useful metric to assess the health and function of our autonomic nervous system (ANS). HRV is affected by factors such as stress, exercise, and sleep. Fitness trackers like Fitbit have incorporated HRV monitoring to provide users with insights into their cardiovascular well-being.The Science Behind HRV on Fitbit
Fitbit devices measure HRV by analyzing the small changes in the intervals between your heartbeats. This is done through optical sensors that detect changes in blood flow by shining a light on your skin. These sensors capture physiological data and transmit it to algorithms designed to calculate HRV.Fitbit uses algorithms to determine HRV using parameters like the standard deviation of NN intervals (SDNN) and the root mean square of successive differences (RMSSD). These parameters reflect the variability in heart rate and the time intervals between heartbeats, respectively.The Accuracy Debate
Accuracy is a crucial factor when it comes to HRV monitoring using Fitbit devices. While Fitbit claims to provide accurate HRV measurements, it is essential to understand the limitations and potential discrepancies that may arise.1. Motion Artifacts: Fitbit HRV measurements can be affected by motion artifacts. Any movement during a reading can cause inaccurate results. It is recommended to remain still while taking HRV measurements to minimize the impact of motion artifacts.2. Device Position: The positioning of your Fitbit device on your wrist can also affect the accuracy of HRV measurements. Placing the device too loosely or tightly can impact the sensor's ability to capture accurate data.3. Skin Contact: Fitbit relies on optical sensors to measure HRV. Therefore, proper skin contact is crucial for obtaining accurate readings. The device should be worn snugly against your wrist without any obstruction.How to Optimize Accuracy
To enhance the accuracy of HRV measurements on Fitbit, consider the following tips:1. Good Fit: Ensure that your Fitbit device fits snugly on your wrist and is not too tight or loose. This optimizes the sensor's contact with your skin and improves accuracy.2. Proper Positioning: Place your Fitbit device on the wrist that minimizes interference from your dominant hand's motion. For example, if you are right-handed, wear it on your non-dominant left hand.3. Maintain Stillness: Stay as still as possible during HRV measurements to minimize motion artifacts. Avoid talking, fidgeting, or engaging in activities that may affect the accuracy of the readings.4. Cleanliness: Keep your Fitbit device and your skin clean to ensure optimal contact between the sensors and your wrist. Build-up of dirt, sweat, or lotion may hamper accurate HRV measurements.The Usefulness of HRV on Fitbit
Despite the potential limitations, HRV monitoring on Fitbit can still provide valuable insights into your cardiovascular health. By tracking HRV over time, you can identify patterns and trends related to stress, exercise, and sleep. This information can help you make informed decisions about your lifestyle and overall well-being.With HRV data, Fitbit can also provide users with valuable information about their recovery and readiness for physical activity. By analyzing changes in HRV, Fitbit can suggest appropriate exercise intensities, recovery guidelines, and personalized wellness advice.Conclusion
Although Fitbit devices offer HRV monitoring, it's important to understand that the accuracy of these measurements can be influenced by various factors. By following the optimization tips mentioned above, you can enhance the accuracy of HRV readings on your Fitbit device.Monitoring HRV on Fitbit can provide valuable insights into your cardiovascular health, stress levels, exercise recovery, and overall well-being. It is a tool that, when used in conjunction with other health and lifestyle indicators, can help you make informed decisions about your health and improve your overall quality of life.How to Watch the Red Sox Game
Streaming Red Sox Games Online
In today's digital age, watching your favorite sports team live has become easier than ever. If you're a fan of the Boston Red Sox and want to catch their games, you have several options. One of the most convenient ways to watch the Red Sox game is by streaming it online. This allows you to enjoy the game from the comfort of your own home or on the go. In this tutorial, we'll guide you through the process of streaming a Red Sox game and provide you with all the necessary resources.Choosing a Streaming Platform
There are a few different streaming platforms that offer live coverage of the Red Sox games. Some popular options include MLB.TV, ESPN, and Hulu + Live TV. Each platform has its own benefits and features, so it's important to consider your preferences and budget. MLB.TV specifically focuses on baseball games and offers a variety of subscription plans. ESPN is a comprehensive sports channel that often broadcasts Red Sox games. Hulu + Live TV combines live TV channels with access to a wide range of on-demand content.Subscribing to MLB.TV
If you're a die-hard Red Sox fan, MLB.TV might be the best option for you. To start, go to the MLB.TV website and navigate to the subscription page. Here, you can choose between their various plans, including a single-team option specifically for Red Sox games. Once you've selected your preferred plan, follow the prompts to create an account and provide your payment information. Once your subscription is active, you can watch the Red Sox games live on your computer or mobile device.Tuning in to ESPN
ESPN is a popular sports channel that often broadcasts Red Sox games. To watch the games on ESPN, you'll need to have access to the channel through your cable or satellite provider. If you already have an ESPN subscription, all you need to do is tune in to the channel at the scheduled game time. However, if you don't have cable or satellite TV, you can also consider streaming services such as Sling TV, YouTube TV, or Hulu + Live TV, which offer ESPN as part of their channel lineup.Using Hulu + Live TV
Hulu + Live TV is an all-in-one streaming platform that offers both live TV channels and a vast library of on-demand content. To watch Red Sox games on Hulu + Live TV, you'll need to subscribe to their service and have a compatible device, such as a smart TV, streaming stick, or mobile device. Once you're subscribed and logged in, simply navigate to the ESPN channel, where the Red Sox games are usually aired. You can also use the platform's search feature to find specific games or set up DVR recordings for future games.Conclusion
Thanks to the internet and various streaming platforms, watching the Red Sox game has never been more accessible. Whether you choose to stream through MLB.TV, tune in to ESPN, or use Hulu + Live TV, you can catch every exciting moment of the game from anywhere at any time. Consider your preferences and budget to select the best option for you. Get ready to cheer for the Red Sox with the convenience of modern technology at your fingertips!How to Use Speedy Sharp: The Ultimate Tutorial
Introduction to Speedy Sharp
Speedy Sharp is a revolutionary tool that combines convenience and precision for all your sharpening needs. Whether you are a professional chef, an outdoor enthusiast, or a DIY enthusiast, this compact and efficient device will ensure that your blades stay sharp and ready for action. In this tutorial, we will guide you through the steps of using Speedy Sharp effectively and efficiently. So, let's dive right in!The Importance of Sharp Blades
Before we delve into the process of using Speedy Sharp, let's first understand why having sharp blades is crucial. Sharp blades not only enhance your efficiency but also ensure safety. Dull blades require more force to cut through objects, increasing the risk of accidents. Additionally, a sharp blade provides cleaner and neater cuts, resulting in better-looking end products. Whether it's slicing vegetables, sharpening fishing hooks, or sharpening woodworking tools, having sharp blades is essential.Step-by-step Guide to Using Speedy Sharp
Using Speedy Sharp is a breeze. Here's a step-by-step guide to help you get started:Step 1: Proper Safety Precautions
Before you begin sharpening, ensure that you are wearing proper safety gear such as gloves and protective eyewear. Remember, safety should always come first![content]Step 2: Secure the Blade
To sharpen your blade, you need to secure it properly. If you are working with a knife, hold it firmly by the handle. If it's a smaller tool or a hook, ensure that it is stable, either by gripping it firmly or using a vise. A stable blade ensures accurate sharpening.[content]Step 3: Positioning and Angel
Once you have secured the blade, position it against the Speedy Sharp tool at an appropriate angle. For most blades, a 20-degree angle works well. This angle allows for efficient sharpening while maintaining the blade's integrity and strength.[content]Step 4: Sharpening Motion
With the blade in the correct angle and position, move the Speedy Sharp tool across the blade's edge. Use moderate pressure and let the motion be smooth and consistent. Remember, it's the tool that does the work, so there's no need to apply excessive force.[content]Step 5: Testing and Fine-Tuning
After you have sharpened the blade, conduct a quick test on a piece of material. If you feel it could be sharper, repeat the sharpening process. This step ensures that your blade is at its utmost sharpness, ready to tackle any task.[content]Maintaining Your Speedy Sharp
Speedy Sharp is a durable tool, but it requires proper maintenance to ensure its longevity. After each use, wipe the tool clean and store it in a dry and safe place. Regularly inspect the tool for any signs of wear or damage and replace it if necessary. By following these maintenance steps, you can enjoy the benefits of Speedy Sharp for years to come.Conclusion
By following this tutorial, you are now well-equipped with the knowledge to use Speedy Sharp effectively and efficiently. Remember to prioritize safety, properly secure the blade, maintain the correct angle, and let the tool do the work. With Speedy Sharp, you can keep all your blades sharp and ready for any task. Happy sharpening!How to Remove a Device from Family Link: A Step-by-Step Tutorial
Introduction
Family Link is a powerful tool designed by Google that allows parents to monitor and manage their children's online activities on Android devices. However, there may come a time when you need to remove a device from Family Link. Whether your child has outgrown the need for monitoring or you simply want to change devices, this tutorial will guide you through the process. In this article, we will explore the step-by-step instructions to remove a device from Family Link while ensuring your child's safety online.Understanding Family Link
Step 1: Open Family Link on Your Parent's Device
To remove a device from Family Link, start by opening the Family Link app on your parent's device or launching the Family Link website on your computer. Sign in using your parent account credentials.Step 2: Select the Child's Profile
Once you're signed in to Family Link, locate and select the profile associated with the child whose device you want to remove. This will open the child's settings.Step 3: Tap on the "Manage Settings" Option
Within the child's settings, locate and tap on the "Manage Settings" option. This will bring you to a screen displaying various management options for the child's device.Step 4: Choose the "Account Info" Tab
On the management screen, navigate to the "Account Info" tab. This tab contains important information about the child's account, including the option to remove the device.Step 5: Tap on "Remove Account"
In the "Account Info" tab, locate the option labeled "Remove Account." Tapping on this option will initiate the process of unlinking the device from Family Link.Step 6: Confirm Your Decision
A confirmation prompt will appear on the screen, asking you to confirm your intention to remove the device. Read the prompt carefully and tap "Remove Account" once again to proceed.Step 7: Complete the Process
After confirming your decision, the Family Link service will begin the process of removing the device from your child's account. This may take a few moments, so be patient.Conclusion
Removing a device from Family Link is a straightforward process that ensures parental control can be adjusted as children grow older or circumstances change. By following this step-by-step tutorial, you can easily remove a device from Family Link and make the necessary adjustments to protect your child's online safety. Remember, with Family Link, you can always add or remove devices as needed to maintain a safe and nurturing digital environment for your children.How to Use Scope in PUBG PS5
1. Understanding Scope in PUBG
In PlayerUnknown's Battlegrounds (PUBG) for the PlayStation 5 (PS5), scope plays a crucial role in enhancing your gameplay. Scopes are optical attachments that allow you to zoom in on targets and improve your accuracy. They are essential for long-range engagements and can greatly increase your chances of survival. In this tutorial, we will explore how to effectively use scopes in PUBG on PS5.
2. Types of Scopes in PUBG
PUBG offers a variety of scopes that cater to different playstyles and situations. The most common scopes found in the game include:
2.1 Red Dot Sight: The red dot sight is a non-magnifying sight that provides a clear, unobstructed view of your target. It is suitable for close to medium-range combat and offers quick target acquisition.
2.2 Holographic Sight: The holographic sight is similar to the red dot sight but features a reticle that enhances target visibility. It also provides a better field of view compared to the red dot sight.
2.3 2x Scope: The 2x scope offers a small amount of magnification, making it ideal for mid-range fights. It provides better target identification and can help you engage enemies at a distance with improved accuracy.
2.4 4x Scope: The 4x scope offers moderate magnification and is suitable for engaging enemies in medium to long-range combat. It provides an enhanced zoom compared to the 2x scope, allowing you to spot targets from a greater distance.
2.5 8x Scope: The 8x scope is a high-magnification scope that excels in long-range engagements. It allows you to accurately engage enemies from a significant distance and is commonly used with sniper rifles.
3. How to Equip and Use Scopes
Step 1: First, you need to find a scope in the game. Scopes can be found in various loot locations or by looting defeated enemies. Look out for buildings, supply crates, and high-tier loot areas for a chance to find scopes.
Step 2: Once you find a scope, approach it and press the appropriate button to pick it up. The scope will be added to your inventory.
Step 3: To equip the scope, open your inventory by pressing the designated button. Navigate to the scope in your inventory and select it. The scope will now be attached to your equipped weapon.
Step 4: Use the aim button to look through the scope and engage targets. Each scope has its own reticle, which helps you aim accurately. Experiment with different scopes to find the one that suits your playstyle.
4. Tips for Effective Scope Usage
To maximize the effectiveness of scopes in PUBG on PS5, consider the following tips:
4.1 Sight Alignment: When looking through the scope, ensure that the reticle is aligned with your target. Proper sight alignment increases your chances of hitting your target accurately.
4.2 Zeroing Distance: Some scopes, particularly the 4x and 8x scopes, allow you to adjust the zeroing distance. This feature compensates for bullet drop at long distances. Experiment with zeroing distance to improve your long-range shots.
4.3 Scope Sensitivity: Adjust your scope sensitivity in the game settings to match your preferences. Higher sensitivity allows for quicker target acquisition, while lower sensitivity provides stability for precise shots.
4.4 Scanning the Area: Use the zoom capabilities of scopes to scan the area for potential enemies. Zooming in can help you spot enemies at a distance and plan your approach accordingly.
4.5 Scope Attachments: Certain scopes can be equipped with additional attachments, such as a magnifier or a canted sight. Experiment with these attachments to further customize your scope's functionality.
5. Conclusion
Mastering the use of scopes in PUBG on PS5 is essential for achieving success in long-range engagements. Understanding the different types of scopes, equipping them properly, and following effective usage techniques will significantly improve your gameplay. Practice regularly and experiment with different scopes to enhance your precision and dominate the battlegrounds. Good luck!
How to Add Emojis to Samsung Keyboard: A Step-by-Step Tutorial
Introduction
Emojis have become an essential part of our digital conversations, adding more expression and fun to our messages. If you own a Samsung device, you might be wondering how to access and use emojis on the Samsung keyboard. In this tutorial, we will guide you through the process, ensuring you never miss out on the colorful world of emojis.Accessing the Samsung Keyboard
Enabling Emoji Support
Accessing Emojis on Samsung Keyboard
Browsing and Selecting Emojis
Typing Emojis Using Text
Customizing Emojis on Samsung Keyboard
Conclusion
Adding emojis to your Samsung keyboard is a fantastic way to enhance your digital conversations. By following the steps outlined in this tutorial, you can now effortlessly access, browse, and use emojis in your messages. Let your conversations come to life with the wide range of expressive emojis Samsung has to offer. Enjoy expressing yourself creatively in the colorful and exciting world of emojis!How to Get a Free iPhone with EBT
What is an EBT card?
Electric Benefit Transfer (EBT) is a program that provides electronic debit cards to eligible individuals and families who need assistance with purchasing food and other necessities. EBT cards are issued by the government and can be used at authorized retailers to buy groceries and essential items.Can you get a free iPhone with EBT?
Unfortunately, the EBT program does not offer free iPhones or any other electronic devices. EBT is specifically designed to help people meet their basic food needs. However, there are other assistance programs and avenues that may allow you to obtain a free iPhone.Exploring alternative ways to obtain a free iPhone
While the EBT program may not directly provide free iPhones, there are other options you can explore. Here are some alternative ways to potentially get a free iPhone:1. Online Giveaways and Contests: Keep an eye out for online giveaways and contests that offer iPhones as prizes. Many websites and social media platforms regularly host such promotions, giving you a chance to win a free iPhone.2. Phone Carrier Promotions: Check with your local phone carriers to see if they are offering any promotions or deals that include free iPhones. Sometimes carriers offer special discounts or trade-in programs that allow you to get a new iPhone at no cost.3. Non-Profit Organizations: Some non-profit organizations and charities provide assistance with obtaining free smartphones to individuals in need. These organizations often focus on helping low-income individuals, seniors, or those facing financial hardships.4. Government Assistance Programs: Depending on your circumstances and location, there may be government programs that offer free or discounted smartphones to eligible individuals. Research local assistance programs or reach out to social services agencies for more information.5. Recycling Programs: Certain companies and organizations have recycling programs where you can exchange old electronic devices, including smartphones, for rewards or gift cards. These rewards can potentially be used towards purchasing a new iPhone at a reduced cost or even for free.Conclusion
While the EBT program does not provide free iPhones, there are alternative ways to obtain one without direct financial cost. Keep an eye out for online giveaways, check with phone carriers for promotions, reach out to non-profit organizations, explore government assistance programs, or consider participating in recycling programs. Remember to always research and verify the credibility of any offer to protect yourself from scams. With perseverance and some luck, you may be able to find a way to get a free iPhone that suits your needs.How to Remove a Popsocket from Your Phone: A Step-by-Step Guide
Introduction
Removing a Popsocket from your phone can sometimes be a tricky task. Whether you want to replace it with a new design or simply prefer using your phone without a grip extension, this tutorial will guide you through the process. In this step-by-step guide, we will provide detailed instructions on how to safely remove a Popsocket from your phone without causing any damage.Why Remove a Popsocket?
Step 1: Prepare the Necessary Tools
Before you begin, it is important to gather the following tools and materials:- A flat tool such as a credit card or a plastic spatula- A soft cloth or microfiber cleaning cloth- A small amount of rubbing alcohol or adhesive removerStep 2: Assess Popsocket Placement
Step 3: Gently Lift the Edges
Begin by inserting the edge of your chosen flat tool, such as a credit card, underneath the Popsocket. Be cautious to avoid scratching the surface of your phone. Gently lift the edge of the Popsocket while applying even pressure.Step 4: Rotate and Repeat
Once you have lifted one edge of the Popsocket, rotate your phone to work on a different side. Repeat the process of gently lifting the edges until you have loosened the Popsocket from all sides. Be patient and take your time during this step to avoid any damage.Step 5: Remove the Popsocket
Step 6: Clean and Reapply (Optional)
If you plan to reuse the Popsocket or replace it with a new one, it is important to clean the adhesive residue left on the back of your phone. Dampen a soft cloth or microfiber cleaning cloth with rubbing alcohol or adhesive remover. Gently rub the affected area in a circular motion until the residue is completely removed.Precautions to Avoid Damage
While removing a Popsocket, keep the following precautions in mind to ensure your phone remains safe:- Avoid using sharp objects or excessive force to detach the Popsocket, as this may scratch or damage your phone.- Do not attempt to remove the Popsocket while it is in an extended or pulled-out position, as it may snap back and potentially harm your fingers or cause the adhesive to tear unevenly.- Take extra care when removing a Popsocket from a glass or delicate back surface. Slow, gentle movements can prevent any unwanted damage.In Conclusion
Removing a Popsocket from your phone does not have to be a complicated process. By following the steps outlined in this tutorial and being cautious throughout, you can successfully remove the Popsocket without any damage to your phone. Remember to assess the Popsocket placement, gently lift the edges, and rotate until it is loosened from all sides. Finally, pull the Popsocket away from the phone, and if necessary, clean the residual adhesive for reapplication or to prepare for a new Popsocket design.How Much Does It Cost to Build a Squarespace Website?
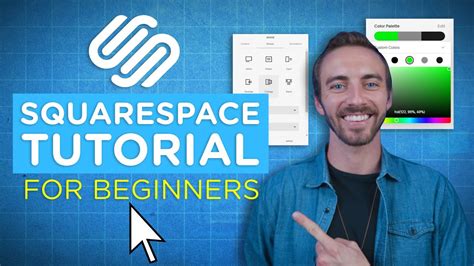
Understanding the Factors That Determine the Cost of a Squarespace Website
When it comes to building a website on the Squarespace platform, there are several factors that influence the overall cost. It's important to have a clear understanding of these factors before embarking on your website-building journey. By assessing your needs and making informed decisions, you can create a Squarespace website that fits your budget and meets your goals.The Squarespace Plans and Pricing
 Squarespace offers a range of plans to cater to different website requirements. The pricing starts at $12 per month for the Personal plan, which includes basic features suitable for a personal blog or small portfolio website. The Business plan, priced at $18 per month, is designed to meet the needs of small businesses. The Commerce plans, ranging from $26 to $40 per month, offer e-commerce functionalities for online stores. Choosing the right plan for your website is crucial in determining the overall cost.
Customizing Your Squarespace Website
 One of the key benefits of Squarespace is its flexibility in design customization. Squarespace provides a wide range of templates to suit different industries and styles. However, customizing these templates to align with your brand identity and specific requirements may require additional efforts and potentially involve hiring a Squarespace professional or a web designer. The cost of customization can vary depending on the complexity of your desired changes.
Integrating Third-Party Services and Extensions
 Squarespace offers a range of built-in features and extensions. However, there might be instances where you need to integrate third-party services to enhance the functionality of your website. Be it email marketing tools, analytics platforms, or customer relationship management (CRM) software, integrating these services may require additional costs. It's essential to consider these expenses when calculating the overall cost of your Squarespace website.
Adding Content to Your Squarespace Website
 Creating high-quality content is crucial for the success of any website. Whether it's informative blog articles, captivating images, or engaging videos, investing in content creation should be an integral part of your website development process. You can either create the content yourself or hire professional content creators. The cost of content creation depends on factors like complexity, quantity, and whether you choose to outsource the task.
Conclusion
Building a Squarespace website involves careful consideration of various factors to determine the overall cost. By understanding the plans and pricing offered by Squarespace, customizing your website design, integrating third-party services, and investing in content creation, you can create a tailored website that showcases your brand effectively. Remember to assess your specific requirements, budgetary constraints, and long-term goals to make informed decisions throughout the website-building process.How to Print from Your Motorola Phone: A Step-by-Step Tutorial
Printing from your Motorola Phone: Overview
Printing from your Motorola phone can be a convenient and efficient way to get a hard copy of important documents or memorable photos. Whether you need to print business presentations, boarding passes, or family pictures, this tutorial will guide you through the process. With the right tools and a few simple steps, you'll be able to print directly from your Motorola phone in no time.Setting Up Your Motorola Phone for Printing
Printing Documents from Your Motorola Phone
Printing documents from your Motorola phone is a straightforward process. Follow these steps to print your important files:1. Open the document you want to print: Open the app where your document is stored. It could be a PDF viewer, document editor, or email client.2. Tap the "Share" button: Look for the Share button within the app and tap on it. This will display a list of available sharing options.3. Select the printing app: From the list of sharing options, select the printing app you installed earlier. It could be Google Cloud Print, PrinterShare, or any other compatible app.4. Adjust print settings (if needed): The printing app will open, presenting you with various print settings. You can choose the printer, print quality, number of copies, and other preferences. Adjust these settings according to your requirements.5. Tap the "Print" button: Once you have set the desired print settings, tap the Print button. Your Motorola phone will send the print job to the selected printer.6. Collect your printed document: Head over to your printer and collect the printed document. Ensure that the printer has enough paper and ink/toner before you start printing.Printing Photos from Your Motorola Phone
Common Troubleshooting Tips for Motorola Phone Printing
Troubleshooting can sometimes be necessary to resolve any printing issues you may encounter. Here are a few common tips to help you troubleshoot printing problems:1. Check the printer's connectivity: Ensure that your printer is connected to the same Wi-Fi network as your Motorola phone and that it is turned on.2. Update your printing app: Check for any available updates for the printing app you installed. Updating the app can often resolve compatibility issues and improve printing performance.3. Restart your phone and printer: Sometimes a simple restart can resolve temporary glitches. Turn off both your Motorola phone and printer, wait for a few seconds, then turn them back on.4. Clear print queue (if necessary): If you notice that previous print jobs are stuck or queued, clear the print queue from the printing app's settings menu or restart the printer to clear the queue.5. Verify ink/toner levels and paper supply: Ensure that your printer has sufficient ink or toner and an adequate supply of paper. Low levels may prevent successful printing or result in poor print quality.Conclusion
Printing from your Motorola phone is an easy and convenient way to get tangible copies of your digital documents and photos. By following the steps outlined in this tutorial, you can set up your Motorola phone for printing, print various documents and photos, and troubleshoot common printing issues. Start making use of your Motorola phone's printing capabilities today, and enjoy the convenience of having physical copies whenever you need them.How to Charge an Android with an iPhone: A Step-by-Step Guide
Can You Charge an Android with an iPhone?
It is a common scenario when you find yourself in a situation where your Android smartphone is running out of battery, but the only available charger is an iPhone charger. Fortunately, it is possible to charge an Android device using an iPhone charger, and we are here to guide you through the process. In this tutorial, we will explain the steps involved in charging an Android phone with an iPhone charger.
Understanding the Compatibility
Before attempting to charge an Android device with an iPhone charger, it is essential to understand the compatibility between the two. Both Android and iPhone devices use different charging connectors - Micro USB and Lightning, respectively. While the connectors are not compatible with each other, there are ways to work around this obstacle.
Using an Adapter or Converter Cable
The most straightforward method to charge an Android device with an iPhone charger is by using an adapter or a converter cable. These accessories allow you to connect your Android smartphone to the Lightning charging port on an iPhone charger. Make sure to purchase a reliable adapter or converter cable that supports data transfer and charging capabilities.
Step-by-Step Guide to Charging an Android with an iPhone Charger
Step 1: Purchase an Adapter or Converter Cable
The first step is to acquire an adapter or converter cable that is specifically designed to connect an Android device to an iPhone charger. There are numerous options available online or at electronics stores. Ensure compatibility with your Android device and verify that it supports charging.
Step 2: Insert the Adapter or Converter Cable
Once you have the adapter or converter cable, insert the Lightning connector into the charging port of the iPhone charger. Ensure it is securely attached.
Step 3: Connect the Android Device
Take the Micro USB connector of the adapter or converter cable and plug it into the charging port of your Android device. Make sure it is correctly inserted and firmly connected to avoid any loose connections.
Step 4: Charging Process
After connecting the Android device to the iPhone charger using the adapter or converter cable, the charging process should initiate automatically. Observe the charging icon on your Android device to ensure it is receiving power. It is essential to note that the charging speed may differ from using a dedicated Android charger.
Step 5: Monitor Charging Progress
Keep an eye on the battery level and charging progress on your Android device. If the battery percentage increases, then the charging process is successful. However, if you experience any issues or the Android device does not charge, try using a different adapter or converter cable.
Conclusion
Charging an Android device with an iPhone charger is possible by using an adapter or converter cable. Although the charging connectors of both devices are not the same, these accessories provide a viable solution. By following the step-by-step guide outlined in this tutorial, you can charge your Android smartphone even when your only option is an iPhone charger. However, it is worth mentioning that using a dedicated Android charger is always recommended for optimal charging performance.
Keywords: charge Android with iPhone, Android charging methods, adapter or converter cable, Android device charging, charging compatibility
Subscribe to:
Posts (Atom)